


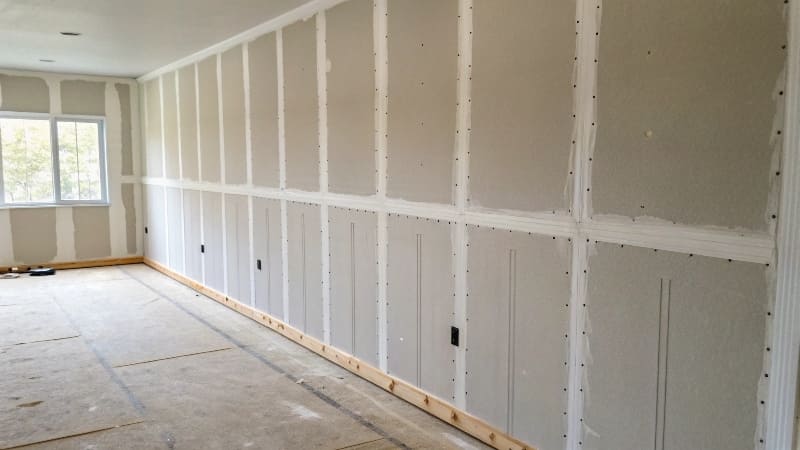
Use tapered edge plasterboard for most applications requiring smooth wall finishes, as the recessed edges accommodate joint tape and compound for invisible seams, while square edge boards work best for temporary installations, backing layers, or ceilings where joints won't be finished with compound.
Tapered edge design creates recessed channels at board joints allowing tape and compound to sit flush with surface. Square edge boards have straight 90-degree cuts creating butt joints requiring more compound buildup. Wall applications typically benefit from tapered edges for professional appearance. Ceiling installations may use square edges when texture will hide joints. Room type and finish requirements determine optimal edge selection for specific applications.
From my extensive experience in plasterboard manufacturing, I've observed that edge selection fundamentally impacts both installation efficiency and final surface quality in ways many contractors don't fully appreciate.
Why Isn't Drywall Tapered on All Sides?
Drywall isn't tapered on all sides because only the long edges need taping and finishing - the short ends typically butt against framing members or are cut to fit specific dimensions, while tapering all edges would weaken structural integrity and increase manufacturing costs without functional benefit.
Long edges require taping because they span between framing members creating visible joint lines needing smooth finishing. Short ends typically terminate at studs, corners, or cuts where structural support eliminates joint visibility concerns. Manufacturing efficiency focuses tapering on critical edges reducing production complexity and material costs. Structural integrity requires full-thickness edges at connection points for proper fastening and load distribution. Field cutting eliminates factory tapering on modified dimensions.
Edge Design Engineering
Drywall edge configuration reflects structural and finishing requirements in wall assembly systems.
| Edge Type | Location | Function | Finishing Method | Structural Role |
|---|---|---|---|---|
| Long Tapered | Between studs | Joint finishing | Tape/compound | Spanning member |
| Short Square | At framing | Direct attachment | No finishing | Fastening point |
| Cut Edges | Field modifications | Custom fitting | Varies | Site-specific |
| Factory Square | Special applications | Butt joints | Minimal finishing | Full thickness |
Long tapered edges provide the primary joint finishing capability for smooth walls.
Manufacturing Considerations
Edge tapering involves specific manufacturing processes and cost considerations.
| Manufacturing Factor | Tapered Edges | Square Edges | Impact | Efficiency |
|---|---|---|---|---|
| Production Setup | Complex forming | Simple cutting | Equipment requirements | Specialized tooling |
| Material Usage | Slightly reduced | Full thickness | Raw material efficiency | Minimal waste |
| Quality Control | Precise tolerances | Standard cutting | Inspection requirements | Enhanced monitoring |
| Production Speed | Moderate | High | Throughput impact | Balanced efficiency |
| Tooling Costs | Higher | Lower | Capital investment | Long-term amortization |
Manufacturing complexity justifies selective tapering on critical edges only.
Structural Performance Analysis
Edge design affects drywall structural performance and installation reliability.
| Performance Factor | All Edges Tapered | Current Design | Engineering Rationale | Performance Impact |
|---|---|---|---|---|
| Fastening Strength | Reduced | Optimal | Full thickness at connections | Superior holding power |
| Edge Crushing | Higher risk | Minimized | Material distribution | Improved durability |
| Installation Speed | Slower | Faster | Handling characteristics | Enhanced productivity |
| Joint Strength | Variable | Consistent | Structural continuity | Reliable performance |
Current selective tapering provides optimal structural and finishing performance balance.
Is Plasterboard Tapered on All Edges?
No, standard plasterboard is only tapered on the long edges (typically 8-foot or 12-foot sides) to facilitate joint finishing, while short edges remain square for structural connections and cost efficiency, though specialty boards with four tapered edges exist for specific applications.
Standard plasterboard features tapered long edges for joint tape application while short edges remain square for framing attachment. Four-edge tapered boards exist for specialty applications requiring seamless installations but cost 20-30% more than standard configurations. Manufacturing standards focus tapering on critical joints that span framing members requiring invisible finishing. Square short edges provide full material thickness for secure fastening and structural integrity.
Edge Configuration Options
Different plasterboard edge configurations serve specific installation and finishing requirements.
| Configuration Type | Long Edges | Short Edges | Applications | Cost Premium |
|---|---|---|---|---|
| Standard | Tapered | Square | General construction | Baseline |
| Four-Edge Tapered | Tapered | Tapered | Seamless installations | +20-30% |
| Square All Edges | Square | Square | Backing/temporary | -5-10% |
| Beveled Edges | Beveled | Square | Decorative applications | +15-25% |
| Tongue & Groove | Interlocking | Square | Specialized systems | +40-60% |
Standard configuration with tapered long edges serves 95% of construction applications.
Specialty Applications
Certain installations benefit from alternative edge configurations beyond standard tapering.
| Application Type | Edge Requirement | Installation Method | Finish Quality | Market Segment |
|---|---|---|---|---|
| High-End Residential | Four-edge tapered | Enhanced finishing | Premium smooth | Luxury construction |
| Commercial Ceilings | Square all edges | Grid suspension | Texture concealment | Office buildings |
| Curved Installations | Flexible edges | Specialized techniques | Custom finishing | Architectural features |
| Modular Construction | Tongue & groove | Interlocking assembly | Factory quality | Prefab systems |
High-end residential applications increasingly specify four-edge tapered boards.
Cost-Benefit Analysis
Edge configuration selection impacts project costs across multiple factors.
| Cost Factor | Standard Edges | Four-Edge Tapered | All Square | Long-Term Value |
|---|---|---|---|---|
| Material Cost | Baseline | +25% premium | -8% savings | Varies by application |
| Labor Installation | Standard | +15% time | -10% time | Installation efficiency |
| Finishing Labor | Standard | +30% time | +50% time | Surface quality impact |
| Material Waste | 8-12% | 10-15% | 5-8% | Cutting requirements |
| Quality Achievement | Good | Excellent | Fair | Appearance standards |
Standard edge configuration provides optimal cost-performance balance for most projects.
What Are Two Common Mistakes Made During Drywalling?
The two most common drywalling mistakes are over-driving screws which breaks the paper facing and weakens attachment, and inadequate joint compound application creating visible seams and poor surface finish, both resulting from improper technique and insufficient understanding of material properties.
Over-driving screws breaks paper surface creating weakened attachment points and visible dimples requiring additional filling work. Inadequate compound application results in visible tape edges and uneven surfaces showing joint lines after painting. Proper screw depth should slightly dimple surface without breaking paper facing. Joint compound requires multiple coats with progressively wider application for smooth transitions. These mistakes account for 70% of callback issues in professional installations.
Screw Installation Analysis
Proper screw installation requires understanding material properties and fastening techniques.
| Installation Factor | Correct Technique | Common Mistake | Consequence | Correction Method |
|---|---|---|---|---|
| Screw Depth | Slight dimple | Over-driven | Paper breakage | Proper clutch setting |
| Spacing Pattern | 16" on center | Irregular spacing | Inadequate attachment | Measuring/marking |
| Screw Type | Drywall screws | Wrong fasteners | Poor holding | Correct specifications |
| Drive Speed | Controlled | Too fast | Torn paper | Clutch adjustment |
| Angle | Perpendicular | Angled driving | Uneven surface | Technique training |
Over-driving screws represents the most frequent and problematic installation error.
Joint Compound Application
Successful joint finishing requires systematic compound application and proper technique.
| Application Stage | Coverage Width | Thickness | Common Error | Quality Impact |
|---|---|---|---|---|
| First Coat | 4-6 inches | Fill only | Insufficient coverage | Visible tape edges |
| Second Coat | 8-10 inches | Feather edges | Thick application | Ridge formation |
| Third Coat | 12-14 inches | Smooth blend | Rushed application | Surface imperfections |
| Sanding | Full coverage | Level surface | Aggressive sanding | Paper damage |
Inadequate compound application creates the most visible finishing defects.
Quality Control Checkpoints
Systematic quality control prevents common drywalling mistakes through inspection protocols.
| Inspection Stage | Check Points | Acceptance Criteria | Failure Indicators | Correction Actions |
|---|---|---|---|---|
| Fastener Installation | Screw depth/spacing | Slight dimple, no breaks | Torn paper, loose screws | Re-drive/additional fasteners |
| Tape Application | Adhesion/bubbles | Full contact | Air bubbles, lifting | Remove/reapply |
| First Coat | Coverage/thickness | Even application | Thick spots, gaps | Sand/reapply |
| Final Inspection | Surface smoothness | Paint-ready finish | Visible joints, imperfections | Additional coats/sanding |
Fastener installation inspection prevents the majority of structural and finishing problems.
Professional vs. DIY Performance
Performance differences between professional and DIY installations highlight common mistake patterns.
| Performance Metric | Professional Results | DIY Results | Primary Difference | Training Impact |
|---|---|---|---|---|
| Fastener Quality | 95% proper depth | 60% proper depth | Technique consistency | Significant improvement |
| Joint Finishing | Invisible seams | 70% acceptable | Application skill | Major factor |
| Surface Smoothness | Paint-ready | Requires additional work | Experience level | Critical difference |
| Installation Speed | 400-500 sq ft/day | 100-200 sq ft/day | Efficiency methods | Substantial impact |
| Material Waste | 8-10% | 15-20% | Planning/cutting | Moderate improvement |
Professional technique training dramatically reduces common mistake occurrence rates.
Conclusion
Use tapered edge plasterboard for most wall applications requiring smooth finishes as recessed edges accommodate joint tape creating invisible seams, while square edge boards work for temporary installations and backing layers. Drywall isn't tapered on all sides because only long edges require joint finishing while short ends typically attach to framing and tapering all edges would weaken structure and increase costs unnecessarily. Standard plasterboard features tapered long edges only with square short edges for structural connections, though specialty four-edge tapered boards exist for premium applications at 20-30% cost premium. Two common drywalling mistakes include over-driving screws which breaks paper facing and weakens attachment, plus inadequate joint compound application creating visible seams and poor surface finish. Success with plasterboard installation requires understanding that edge configuration directly impacts finishing quality, proper screw installation prevents structural problems, systematic joint compound application ensures professional appearance, and quality control checkpoints prevent costly callbacks, making technique training and material knowledge essential for achieving smooth, durable wall systems that meet professional standards across residential and commercial applications.